Doily Skirt / Refashioned Women's Shirt
I fell in love with the idea of a doily on a skirt from this post over at MyCakies. She has a lot of fun vintage goodies and three darling little girls. :) Do stop by and enjoy her site!
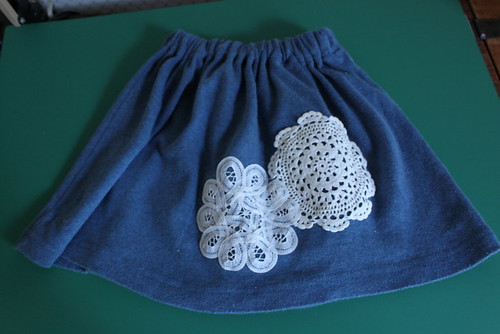
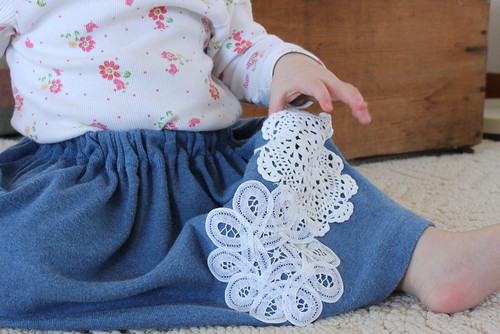
As soon as I saw that blue doily skirt, I knew I had to make my own for Natasha. I've had a couple old knit shirts of mine laying around and rather than hand them over to goodwill, I figured I could make something out of them. So I selected the blue one and did just that. Made something from it. :)
Ta da:
Here's how to do it yourself:
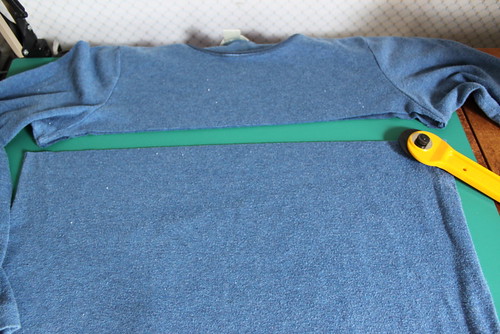
1. Take an old shirt and smooth it out as best you can, taking care to line the hem up so it's level in the front and back. The main part of the shirt from the sleeves down, will become the skirt. We'll use the hem of the shirt, as the hem of the skirt and thus eliminate some work for ourselves.
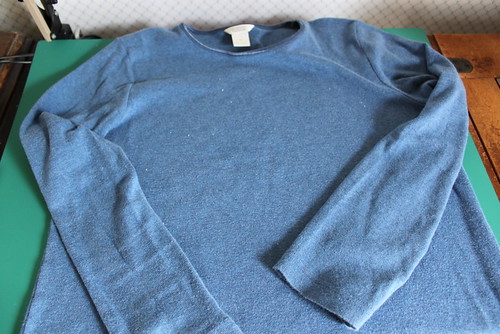
2. Cut it straight across just below the sleeves.
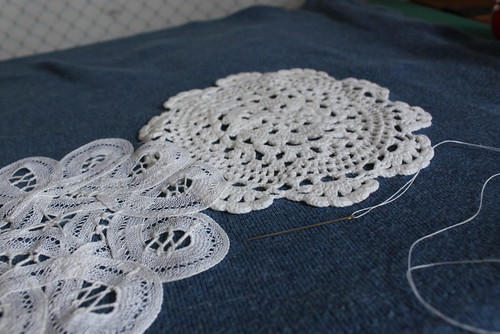
3. Next, lay out a doily or two. I think any decoration or appliqué would be cute here...even a yo-yo or two! Just be creative.
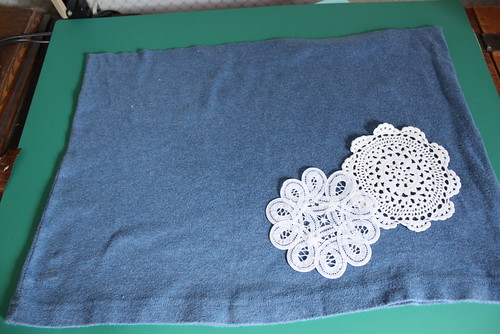
4. Hand sew them on, making sure they lay flat and are tacked well at the edges.
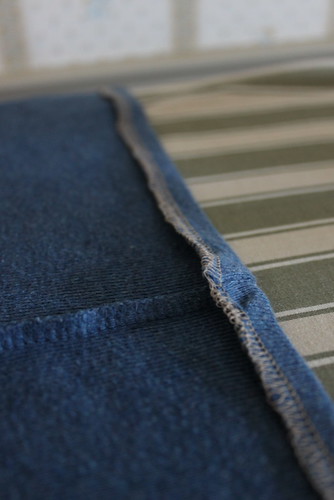
5. Next, you can serge or zig-zag the top raw edge (where you cut it off) so it's easier to work with. Skip this step if you aren't working with a jersey knit, if you're in a hurry, or you can handle knits better than I can...
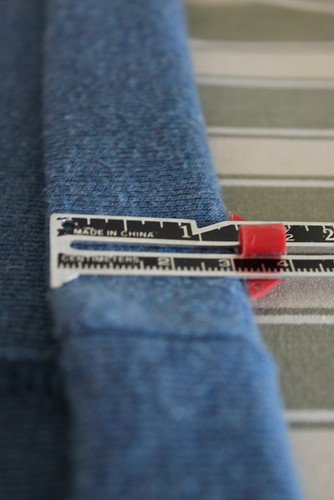
6. To create the top casing for an elastic waistband, and working from the inside (wrong side) of the shirt/skirt, iron the top edge down just a tad.
(Like, a 1/4 in. or so.)
7. Fold it over once more, this time a wider say, an inch or so. I did this an inch and a quarter, but that was too big. So make it an inch.
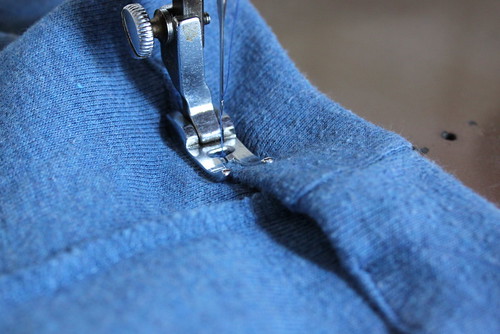
8. Sew all the way around, close to the fold, but leave an opening of about 2 inches so you can insert the elastic.
9. Okay! We're almost done! Cut a length of elastic to fit your little girl's waist, or fat little belly, in Natasha's case. Add a little extra to overlap the ends. 3/4 in. wide elastic makes a nice size for a waistband. Insert it with a safety pin, or one of these handy little gizmos:

Hold on to the other end of the elastic, or pin it at your opening, so you don't end up just threading your elastic round and round and round inside your casing... ;)
(Yep, this was a scrap piece of elastic cut off of a previous project...that's why it has some random threads...)
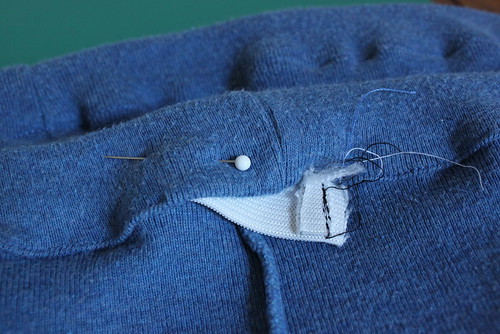
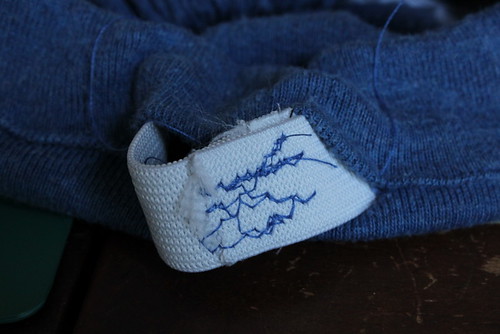
10. Once you reach your opening, overlap the elastic ends and secure well. Make sure your elastic didn't get twisted inside the casing, and is laying flat all the way around.
Like my tacky zig-zag securing? Once that's secure, sew your opening shut, back tacking at each end. Oh, try not to catch the elastic. That's not very fun.
And....you're done!
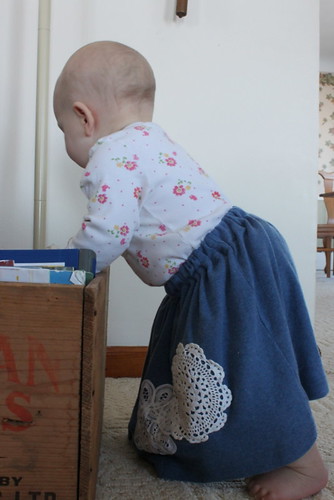
As you can see, on an almost 10 month old, this skirt is rather long. I didn't know it would be this long! I figure that's okay, since she can wear it longer if I just increase the elastic when it gets too tight at the waist. But, I do plan to make some tucks in the skirt somehow so it doesn't look SOOO very long right now.
Thanks Ruby for the doily inspiration!
As soon as I saw that blue doily skirt, I knew I had to make my own for Natasha. I've had a couple old knit shirts of mine laying around and rather than hand them over to goodwill, I figured I could make something out of them. So I selected the blue one and did just that. Made something from it. :)
Ta da:
Here's how to do it yourself:
1. Take an old shirt and smooth it out as best you can, taking care to line the hem up so it's level in the front and back. The main part of the shirt from the sleeves down, will become the skirt. We'll use the hem of the shirt, as the hem of the skirt and thus eliminate some work for ourselves.
2. Cut it straight across just below the sleeves.
3. Next, lay out a doily or two. I think any decoration or appliqué would be cute here...even a yo-yo or two! Just be creative.
4. Hand sew them on, making sure they lay flat and are tacked well at the edges.
5. Next, you can serge or zig-zag the top raw edge (where you cut it off) so it's easier to work with. Skip this step if you aren't working with a jersey knit, if you're in a hurry, or you can handle knits better than I can...
6. To create the top casing for an elastic waistband, and working from the inside (wrong side) of the shirt/skirt, iron the top edge down just a tad.
(Like, a 1/4 in. or so.)
7. Fold it over once more, this time a wider say, an inch or so. I did this an inch and a quarter, but that was too big. So make it an inch.
8. Sew all the way around, close to the fold, but leave an opening of about 2 inches so you can insert the elastic.
9. Okay! We're almost done! Cut a length of elastic to fit your little girl's waist, or fat little belly, in Natasha's case. Add a little extra to overlap the ends. 3/4 in. wide elastic makes a nice size for a waistband. Insert it with a safety pin, or one of these handy little gizmos:
Hold on to the other end of the elastic, or pin it at your opening, so you don't end up just threading your elastic round and round and round inside your casing... ;)
(Yep, this was a scrap piece of elastic cut off of a previous project...that's why it has some random threads...)
10. Once you reach your opening, overlap the elastic ends and secure well. Make sure your elastic didn't get twisted inside the casing, and is laying flat all the way around.
Like my tacky zig-zag securing? Once that's secure, sew your opening shut, back tacking at each end. Oh, try not to catch the elastic. That's not very fun.
And....you're done!
As you can see, on an almost 10 month old, this skirt is rather long. I didn't know it would be this long! I figure that's okay, since she can wear it longer if I just increase the elastic when it gets too tight at the waist. But, I do plan to make some tucks in the skirt somehow so it doesn't look SOOO very long right now.
Thanks Ruby for the doily inspiration!


Comments
Post a Comment
Thoughts and comments are always nice. I love to hear from my readers.