Tag Blanket Tutorial
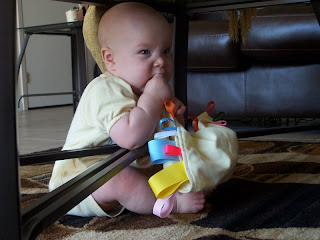
Back in November, before we went on a very long car ride,
I whipped up a new play-thing for my little girlie.
She loves tags. Tags on clothes, tags on stuffed animals, ribbons, bows, etc...
So I made her a tag blanket like many other people have done.
I whipped up a new play-thing for my little girlie.
She loves tags. Tags on clothes, tags on stuffed animals, ribbons, bows, etc...
So I made her a tag blanket like many other people have done.
 Here's how you can make your own too!
1. Gather supplies.
~Lots of ribbons, all colors, sizes, textures, and widths.
~Two pieces of soft cloth, cut into a square. I think mine was 14" x 14".

2. Cut the ribbons in various lengths,
taking note what size they'll be when folded in half.
Lay them out however you desire,
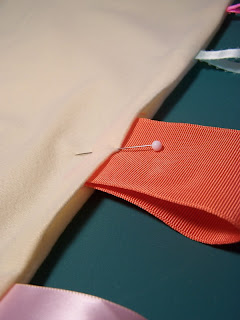
on the right side of your first piece of fabric.
Make sure the edges of the ribbon are aligned with the cut edge of the fabric,
and that the ribbons are sticking INside.
See below:

3. Fold the ribbons in half and pin.
Or, lay the second piece on top (right sides together) and pin the ribbons and
the second piece of fabric at the same time.

4. Sew all the way around*, with about a half inch seam allowance.
Or a fourth. Or, the width of your presser foot.
Or, an inch if you want to be generous.
Seriously, it doesn't matter. Don't fret this little point.

*Don't forget to leave an opening to turn the blanket!*
(You will want to remember this point.)
I left about a 4 inch opening, and backtacked at each side.
I figured it would be easy to add a ribbon in that empty spot, so I left enough room for that.

(The above picture is just illustrating how much room I needed.
Don't stick the ribbon in yet.)
5. Trim the corners.
Also, trim any odd pieces of ribbon that aren't
lined up with the seam allowance.
Skip that last piece of advice,
if your fabric is thick enough that you can't see through it.
Mine wasn't, so I wanted it cut nicely at the seams.
 6. Now turn it right side out.
It should look something like this:
See the gap? That's where I turned it,
and where I'm going to insert the last ribbon.
and where I'm going to insert the last ribbon.

Oh, ironing it now is a big help. Especially the gap.
Iron the seam allowance at the gap soit will align with the sewn seam allowance.
Pull the ribbons out tight, so you get a smoother seam line.
7. Insert the final ribbon, folded in half and this time,
poking OUT, like the others.


Comments
Post a Comment
Thoughts and comments are always nice. I love to hear from my readers.