Diaper Pail Liner Tutorial
She supplied me with things like:
*Tea tree oil to add to the rinse water when you wash.
*A zippered "wet bag" for the diaper bag.
*Flushable liners to use in the diaper if you need to apply some diaper cream (wouldn't want it to mess up the cloth diaper fabric).
*A flip-up lid diaper pail.
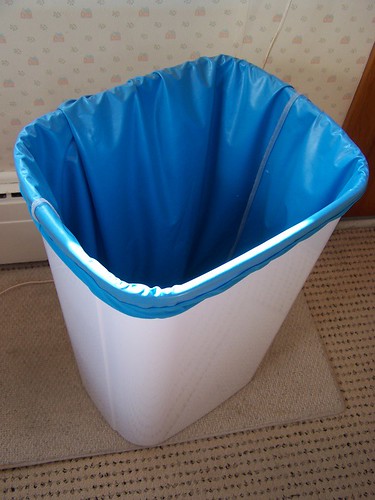
*And even a diaper pail liner to go IN the diaper pail! It works wonderfully.
The only problem is, when it's getting washed, the baby doesn't stop needing her diaper changed. It's like milking cows. They don't know it's a holiday, thus they still need milked on the Fourth of July, Thanksgiving, Christmas, Valentine's Day, Easter... well, you get the idea.
But anyway, I decided months ago, to copy the "Blueberry" diaper pail liner I was given, and make another one so I can alternate the liners when I'm doing the wash. The Blueberry liner has nice boxey corners at the bottom, which I think are pretty snazzy. I studied it and studied it, trying to figure out how it was made, and I'm as pleased as punch that I cracked the code!
So without further ado, here is my second diaper pail liner!
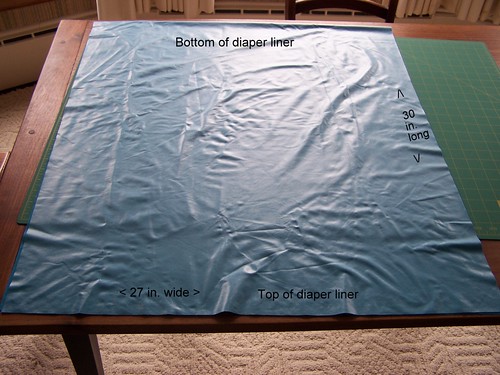
This is PUL, waterproof fabric. It's what I make the outside of diapers with, so I don't need a plastic cover. It comes 60 in. wide. (Well, at least mine did.)
Using my first liner as a guide, I cut the fabric 27 in. for the width of the liner, and kept the center fold as it was, using 30 in. for the length.
The fold (at the top of the picture) is going to become the bottom of the liner, like a pillowcase, without a seam. This is the shiny "wrong side" of the fabric.
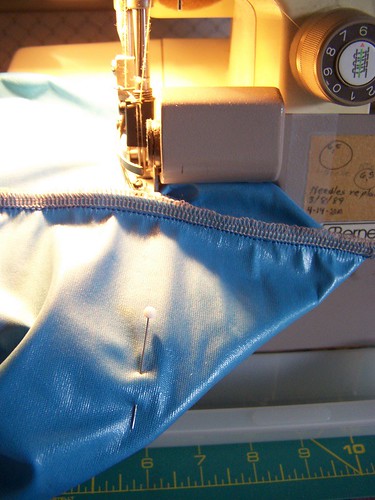
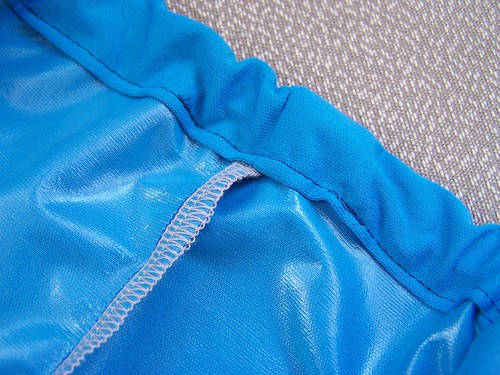
With right sides together, (that would be with the shiny sides OUT), sew the side seams using about a 3/8 in. seam allowance:
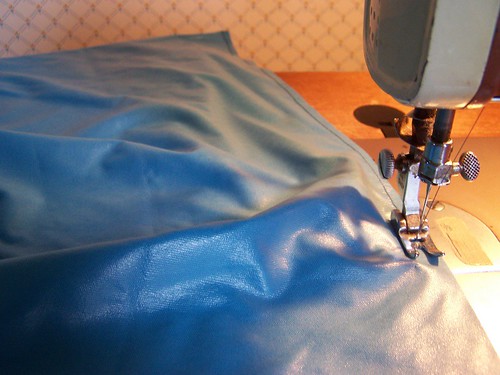
Then serge the edges. You could also do a French seam finish, if you don't have a serger.
This is a great resource and even has pictures for various seam finishes: "Seam Finishes Simplified"
(Or, you know what? You might even get away with just sewing it. PUL doesn't ravel, so serging it might just be for that professional finished look. Just do whatever you want.)
**You can actually skip this next step, and go straight to making a casing for the elastic at the top of your bag. If you do that, your diaper pail liner will look just like a giant pillowcase. It will work just fine and you will save yourself a bit of time. Or, you can stick with me and make it more professional with this next step.**
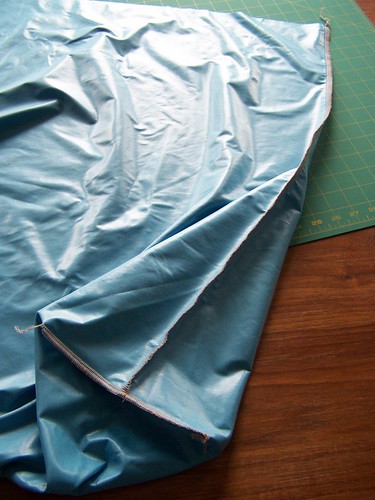
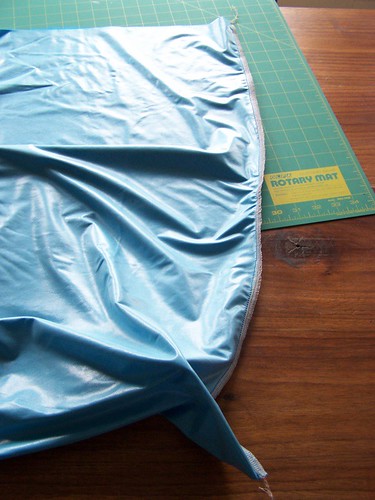
Boxy corners. How cool is that?
Here's a picture of what we're trying to accomplish:
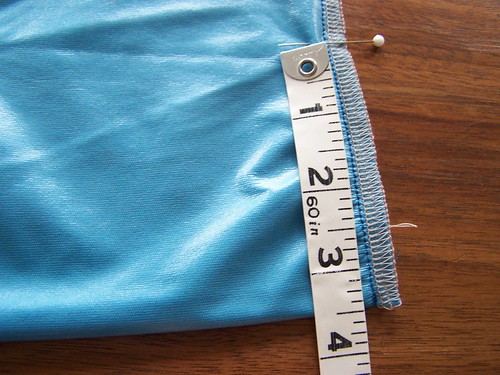
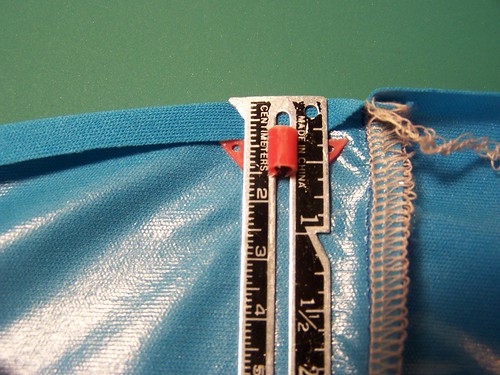
Start with measuring up 3 1/2 in. from the bottom corner. Pin, to mark it.
Then spread the fabric out like sideways, and measure about 6 1/2 in. across.
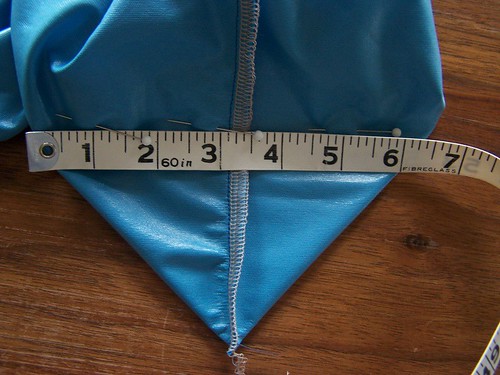
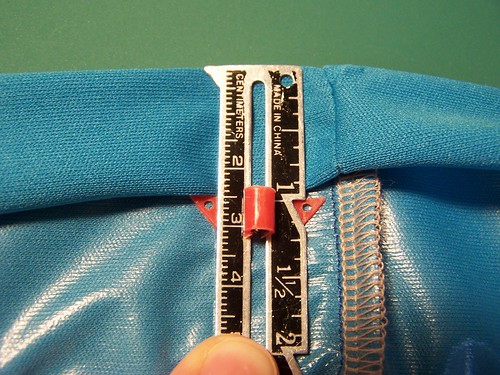
It should look something like this, all folded and pinned:
This is where you will be serging to make that nice box bottom in your liner.
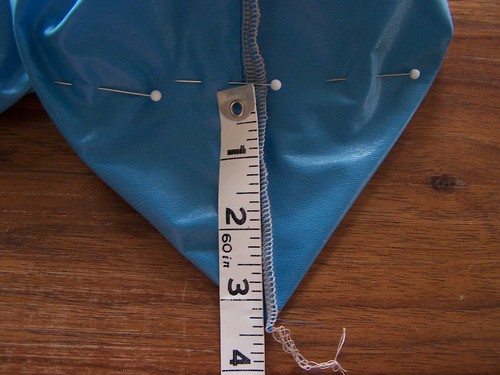
I simply serged it right along the pin line, but if you don't have a serger, sew straight across and finish (or don't finish) the seam as you like.
Do that to both bottom corners, then move back to the top of the bag to work on the elastic casing.
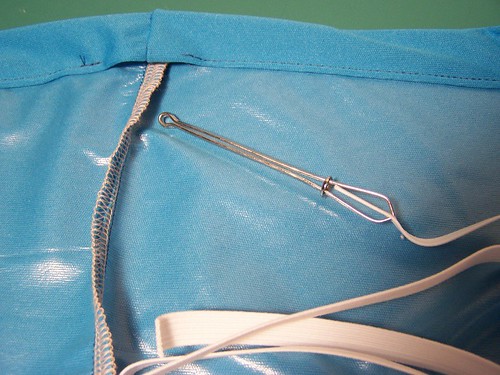
First, fold down the raw edge as so:
Then again:
Stitch around near the edge you folded down, and leave an opening. Insert elastic. I used 3/8 in. and you can cut it as long as you need, just make sure it fits snugly around the top of your pail.
Close the opening and be sure to back-tack.
My other pail liner has a grommet at the top for an elastic drawstring. But, I don't use the drawstring to hang it on a door handle or anything, so I didn't add it.
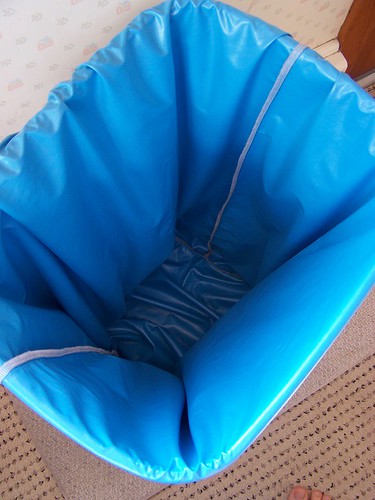
Now snap that elastic around your pail and change a diaper to try it out!
Oh, and admire how nicely the liner fits in the bottom of your pail!


I like this! Good job. :) Heh - "cracked the code!" That is kind of fun, though, to see something you'd like to make, and figure it out and make your own.
ReplyDeleteWhat kind of diaper pail is this? I would love to get one and make a couple of the liners up for a friend's baby shower this Saturday.
ReplyDeleteHello Kathy! This is actually just a large, plastic, kitchen wastebasket; Rubbermaid style. The lid is the spring loaded kind, with a "button" to push, so then the lid flips open on its own. Hope this helps and the shower is wonderful!
ReplyDelete